
License Configuration
After installing and activating the WooMpesa plugin, you need to configure your plugin settings to enable payment processing through M-Pesa. Follow these steps carefully to ensure everything works smoothly.
Access WooMpesa Settings
- Log in to your WordPress admin dashboard.
- Navigate to WooCommerce → Settings → Payments.
- Locate M-Pesa (WooMpesa) and click Manage.
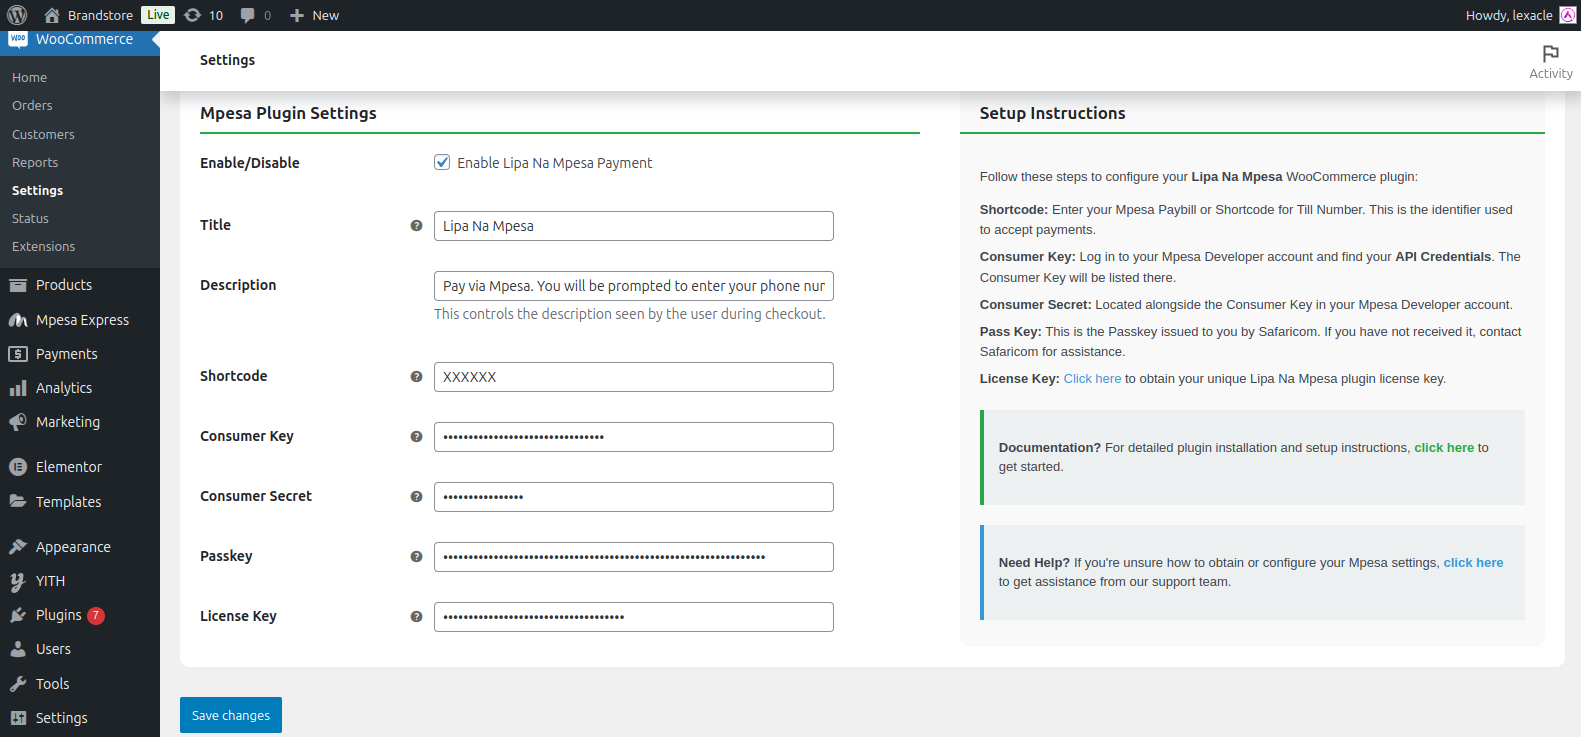
Configure M-Pesa Credentials
Fill in the required fields with the appropriate values obtained from your Safaricom Daraja portal and license portal.
Shortcode
Enter your Paybill or Till Number. This is the shortcode used to accept payments.Consumer Key
Log in to your Safaricom Developer Portal and locate your application's API credentials. Copy the Consumer Key.Consumer Secret
Located next to your Consumer Key in the same developer dashboard.Passkey
This passkey is issued to your business by Safaricom. If you do not have it, contact Safaricom to request it.
WooMpesa configuration screen for entering credentials and license key.
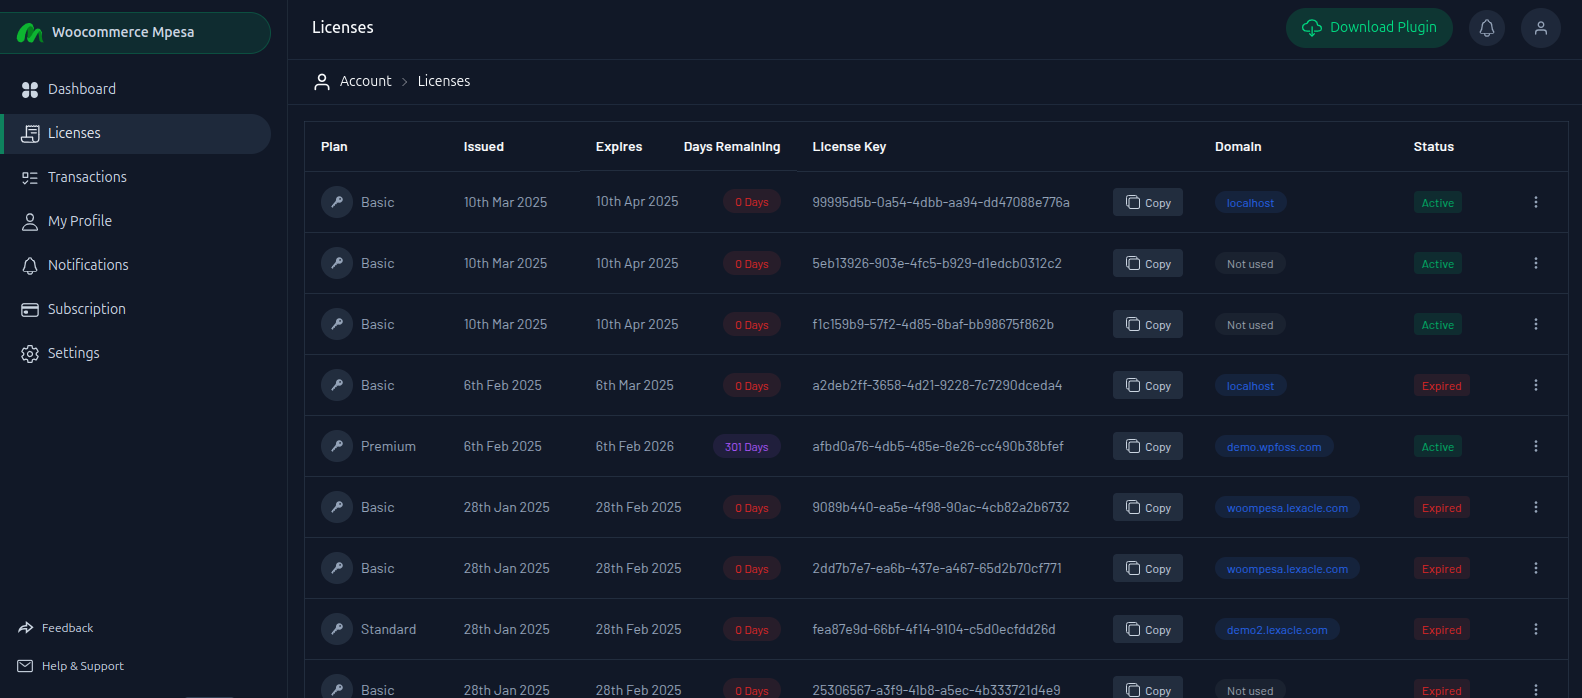
Configure Your License Key
You must provide a valid license key to activate and use the WooMpesa plugin.
- Visit your WooMpesa Portal and log in.
- Navigate to the Licenses section.
- Copy the license key you purchased.
- Paste it in the License Key field inside the plugin settings page.
Tips
Each license key will be linked to a specific domain after setup. Make sure you use the correct key for your website.
Copy your WooMpesa license key from the licenses to the WooMpesa configuration panel to activate the plugin.
Save Changes
After entering all the credentials and license information:
- Double-check the values to ensure accuracy.
- Click the Save Changes button at the bottom of the settings page.
- Test the payment system to confirm that M-Pesa checkout is functioning properly.